Add recipients form fields
In some types of documents, you may encounter situations where certain signer fields need to be pre-filled with known information. This could include anything from a name and surname to a date of birth or driver’s license number. Additionally, certain contract details - such as the agreed-upon amount or the lease start date - are often finalized well before the document is actually signed. In such cases, it’s helpful to prepopulate specific signer fields and make them required before sending the document out for signature. Let’s take a look at a common example: a residential lease agreement between a landlord and a tenant, where we’ll pre-fill certain fields for both parties.
Notes: Make sure to name the fields of the signing parties. If they are left unnamed, the Sender Form Fields option will not be visible.
- Create a document that includes one or more parties (in our case, the Landlord and the Tenant).
- Go to the template page and click the (Preferences) icon in the top-right corner.

- In the modal window that opens, expand the Form preferences section.
- You will see the Sender form fields section, where you can select the fields you want to pre-fill.
- Select the field you want to pre-fill and click the Add button.
Repeat this step for any additional fields you’d like to prepopulate.
These fields can belong to any signer - whether it’s the Landlord or the Tenant.
For example, for the Landlord, this might include: Rental Property Address, Start Date, or Pets Allowed.
For the Tenant, it could be: Occupants.
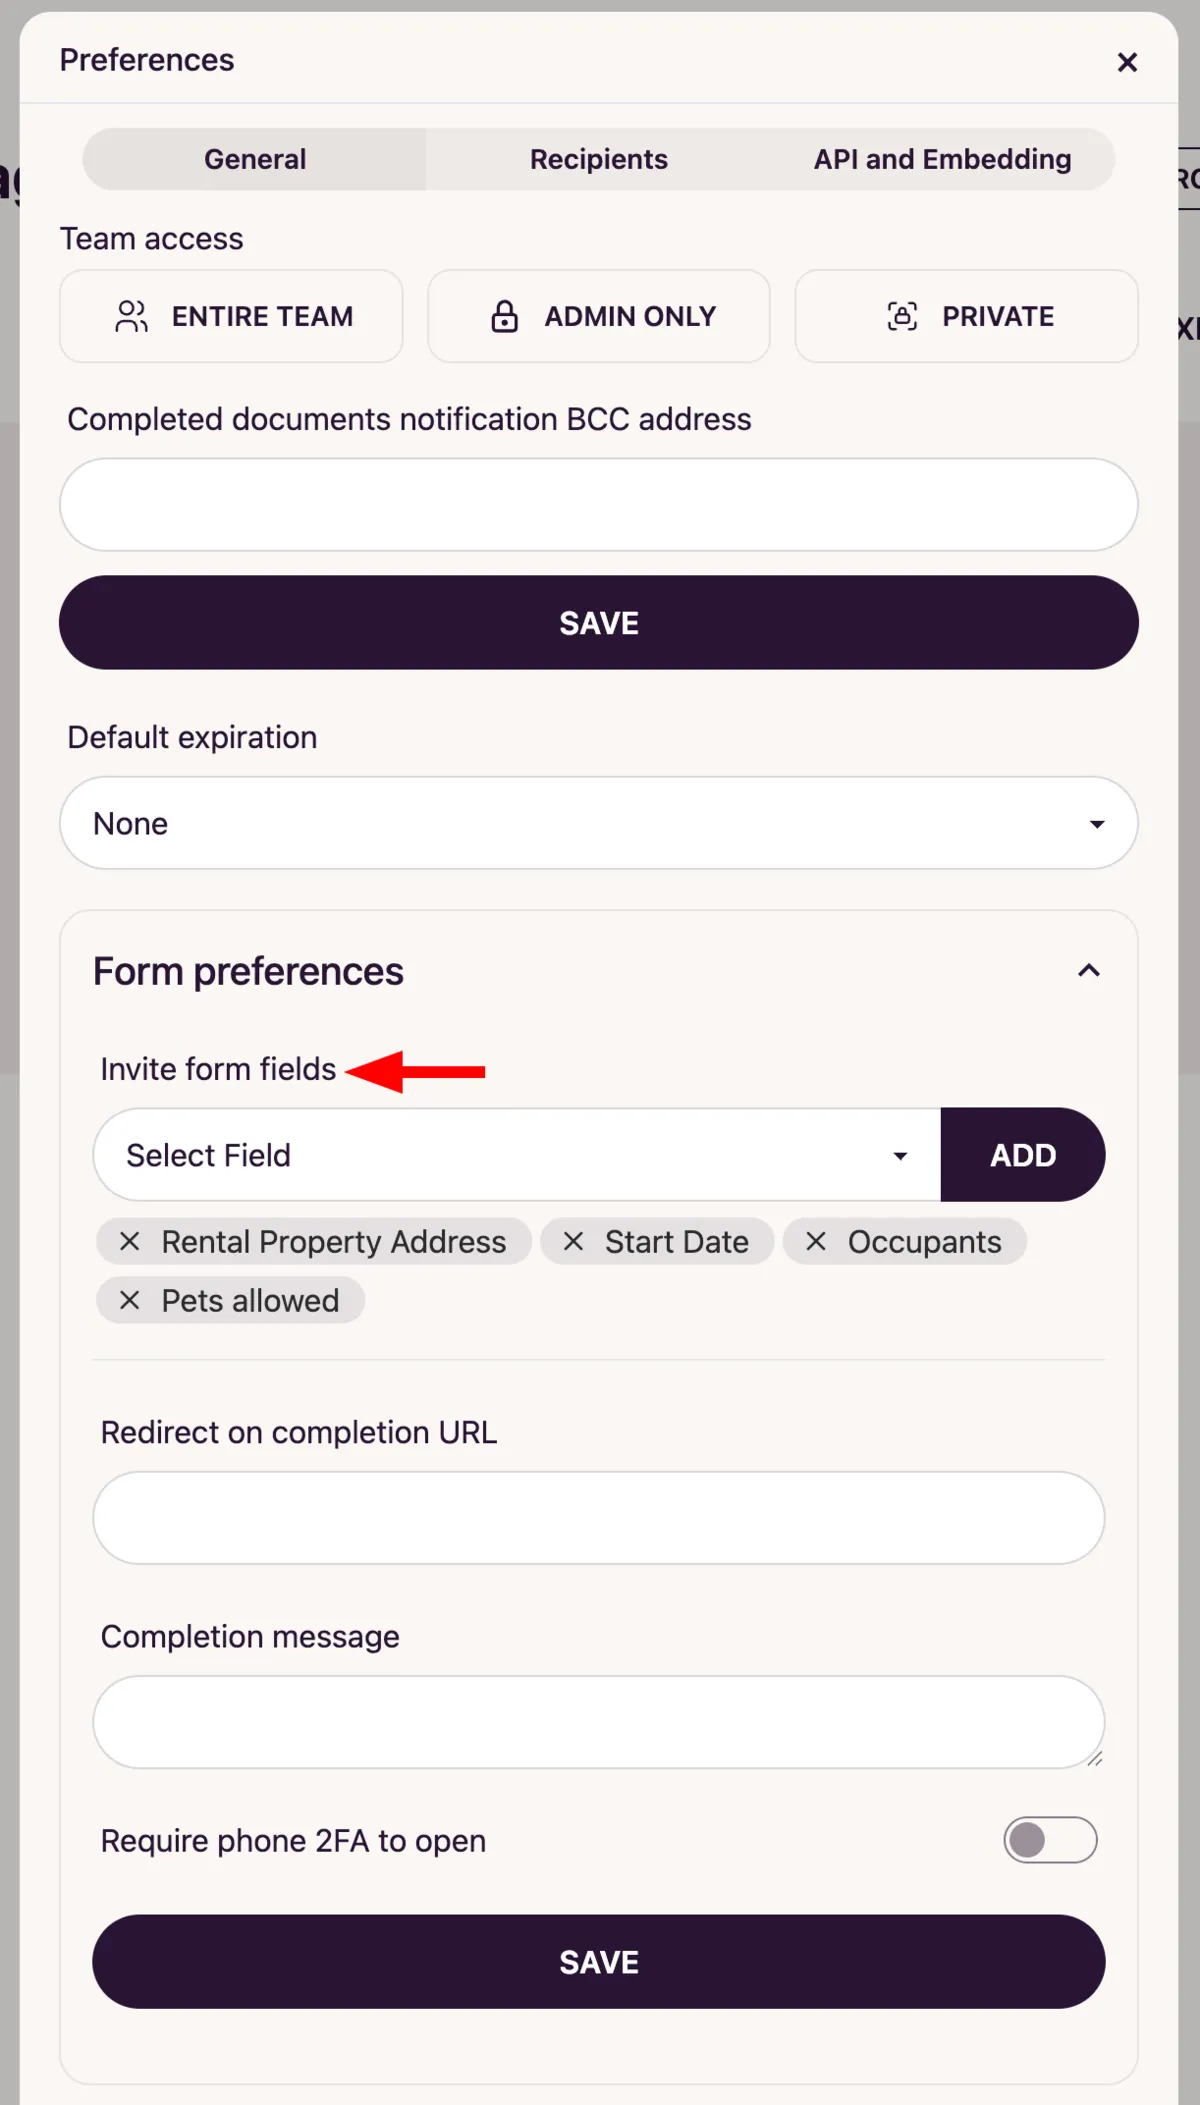
- Then, click Save to apply the changes to the template.
- From now on, whenever you send this document out for signing, you’ll be required to fill in those fields before sending it.
How to send a document with pre-filled fields to signers
- Open the template that includes the pre-filled fields you added earlier.
- Click Send for signature or Add recipients.
- In the modal window that appears, you’ll see a list of fields you configured in the previous step.
- Fill in these fields with the appropriate information.

- Once all fields are completed, click Add recipients.
- The signers will receive an invitation to sign the document, but they won’t need to fill in those fields - you’ve already done it for them.
How to allow signers to edit pre-filled fields
- After adding the fields to your template, go to the template editor.
- Click the gear icon ( ) next to any field you want the signer to be able to modify.
- In the dropdown menu that appears, uncheck the Read-only option.
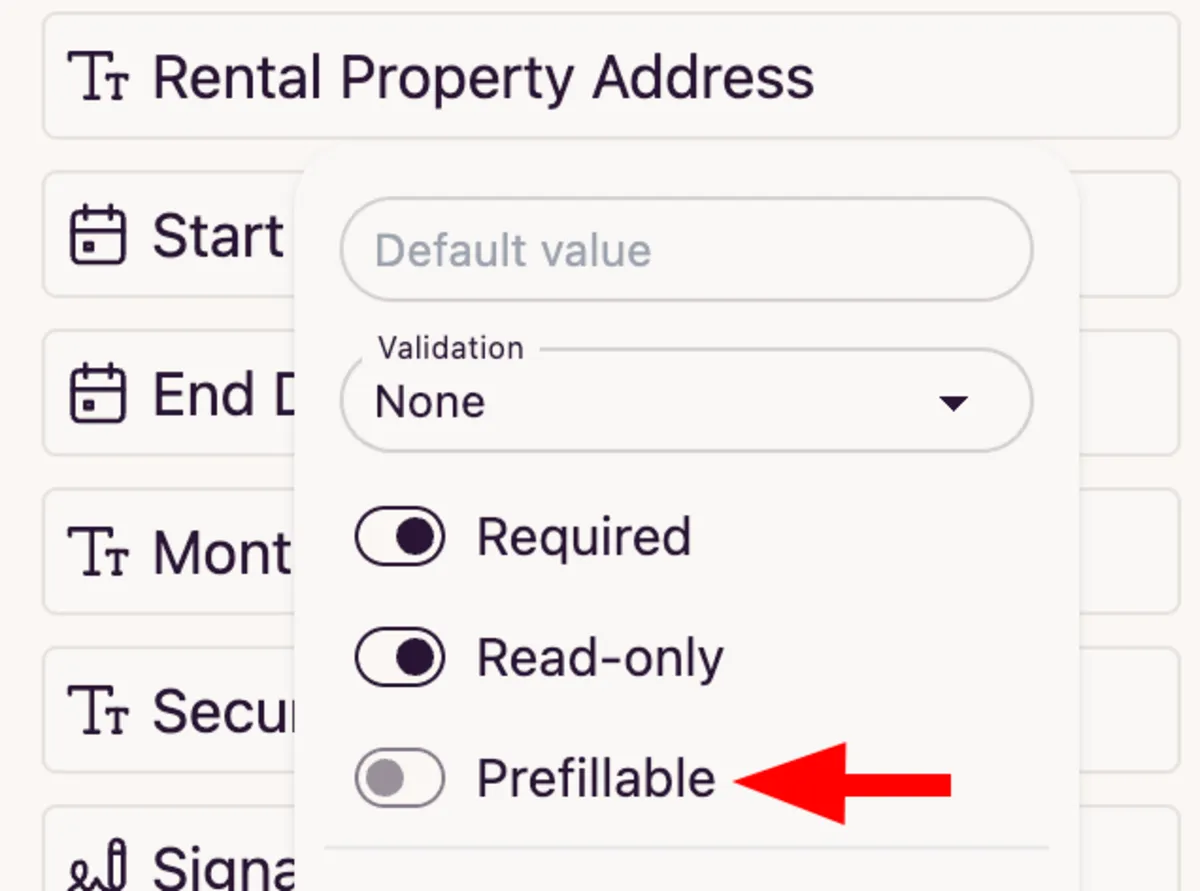
- Done! The signer will now be able to edit the value of that field before signing the document.