Personalize email messages
You can personalize your email messages using templates.
Templates can be customized as either plain text or HTML messages (HTML is available only in DocuSeal Pro).
Each template can contain additional variables that will be replaced with the corresponding values.
For example, {{template.name}} will be replaced with the template’s name.
Note that using variables is not mandatory.
Show all email message variables
| Variable | Description |
|---|---|
{{template.name}}
|
Name of the template document form |
{{template.id}}
|
ID of the template document form |
{{submitter.link}}
|
Signing form link |
{{account.name}}
|
Your company name |
{{sender.name}}
|
Full name of the user requesting signature |
{{sender.first_name}}
|
First name of the user requesting signature |
{{submitter.email}}
|
Signer (aka Submitter) email address |
{{submitter.name}}
|
Signer (aka Submitter) full name |
{{submitter.first_name}}
|
Signer (aka Submitter) first name |
{{submitter.FieldName}}
|
Signer (aka Submitter) field value |
{{submitter.slug}}
|
Unique key which is used to open the embedded signing form |
{{submission.submitters}}
|
A list of submitter emails |
{{submission.expire_at}}
|
Submission expiration date and time |
{{submitters[1].email}}
|
Email of the first party |
{{submitters[1].name}}
|
Name of the first party |
{{submitters[1].FieldName}}
|
Form field value of the first party |
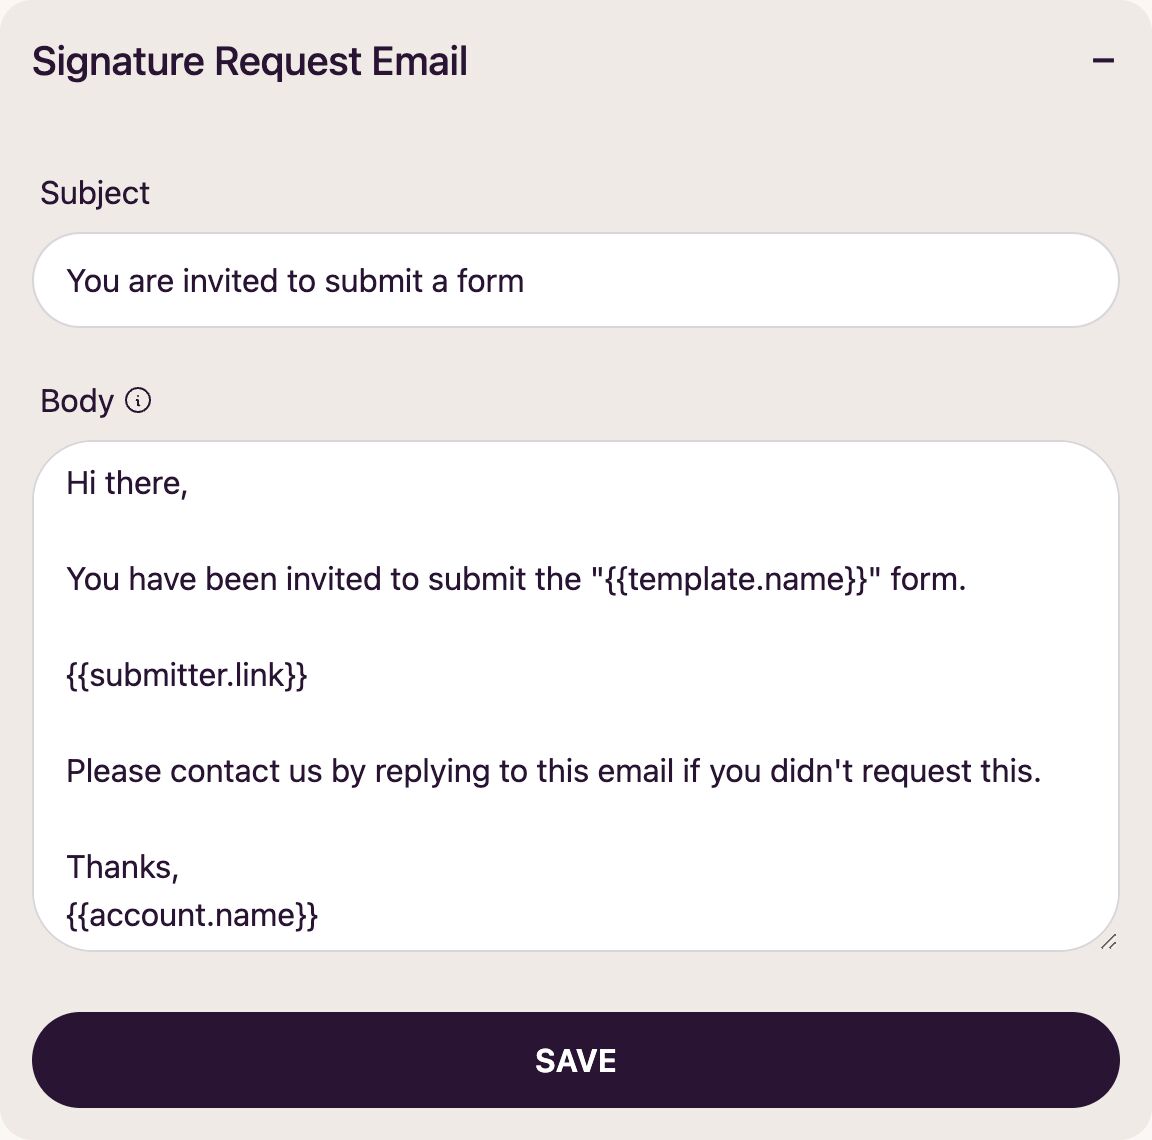
Personalize text email messages
- In the top menu, click on Settings and select Personalization from the menu on the left.
- Click on the + button next to the email template you want to personalize.
- In the expanded section, you will see the template’s title and its content.
- Click on the Text to switch to the text editor (available only in DocuSeal Pro). Now you can modify these details.
- Click on Save to apply your changes.
- You have now successfully personalized the email template.
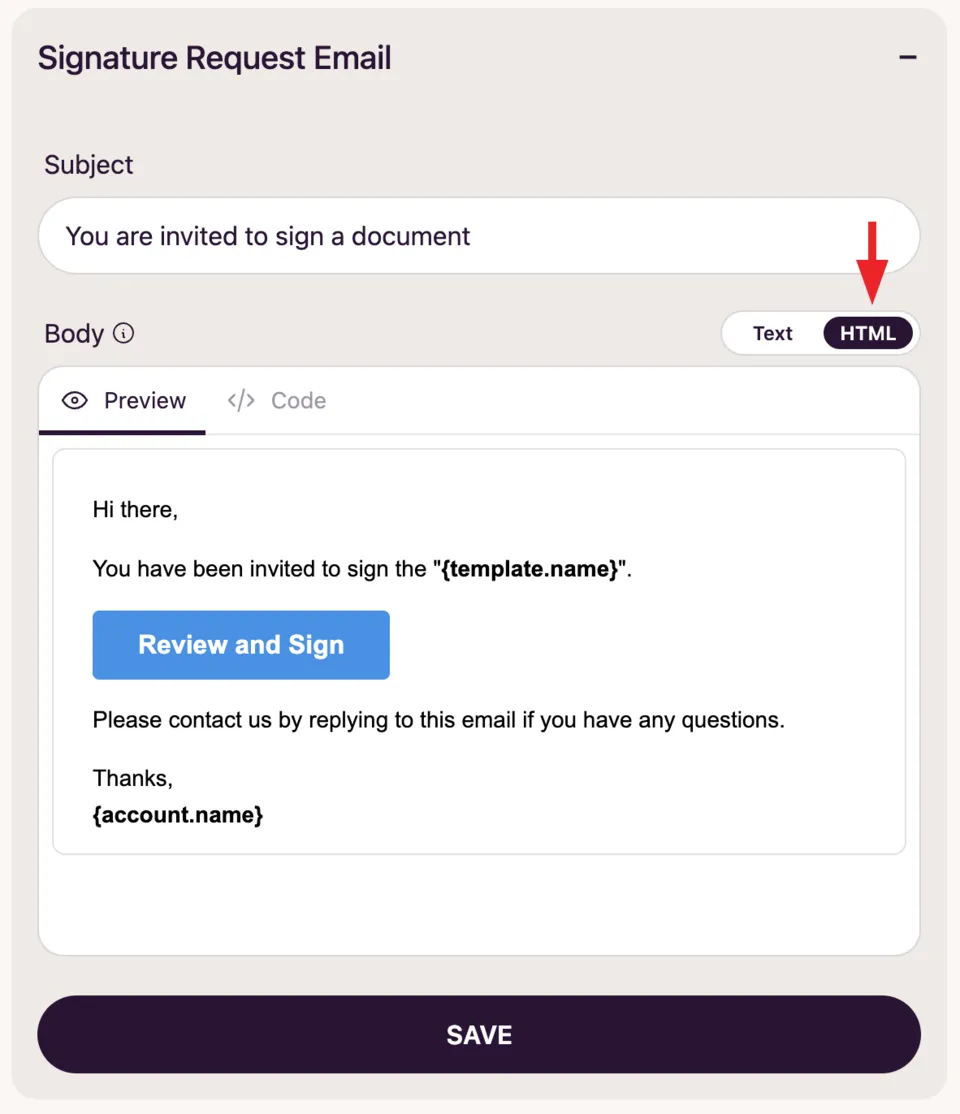
Personalize HTML email messages
This feature is available in the Pro plan
- In the top menu, click on Settings and select Personalization from the menu on the left.
- Click on the + button next to the email template you want to personalize.
- In the expanded section, you will see the template’s title and its content.
- Click on the HTML to switch to the HTML editor (available only in DocuSeal Pro).
- Connect your Gmail or Outlook account to DocuSeal (if you haven’t already) to be able to send HTML emails, or configure an SMTP server.
- Click on the Code tab to view and edit the HTML code of your template.
- Click on the Preview tab to see how your email will look. Note: if you only need to change certain text, you can do this directly in the preview without editing the HTML code.
- Click on Save to apply your changes.
- You have now successfully personalized the HTML email template.
Note
If you have not applied all template variables but wish to use them in the future, hover over the icon. A tooltip will display a list of variables that can be utilized.